Eyes are the windows to the soul, and with the right makeup, they can truly shine. Mastering eye makeup can feel daunting, especially with the seemingly endless array of palettes and products available. But what if achieving a variety of stunning looks was simpler than you think? This guide proves that you don't need a mountain of cosmetics to create captivating eye makeup; one versatile palette is all you need to unlock a world of possibilities. Forget the confusion and overwhelm – we'll break down the basics and show you how to maximize your palette's potential.
We'll demystify the art of eye makeup application with a step-by-step guide that uses a single palette to create multiple looks, from subtle daytime chic to dramatic evening glamour. Prepare to discover the power of blending, shading, and highlighting techniques that will transform your everyday makeup routine. Get ready to explore diverse looks, all while simplifying your makeup bag and saving both time and money. Let's dive into the step-by-step process and unlock your inner makeup artist!
Safety Guidelines
- Always wash your hands before applying eye makeup to prevent bacteria transfer and infection.
- Do not share your eye makeup with others to avoid the spread of germs and eye infections.
- Check expiration dates and discard old makeup to prevent irritation and infection. Pay attention to any changes in texture or smell.
Methods: Basic Eye Makeup Look
Tools Needed
- flat brush
- blending brush
Step-by-Step Instructions
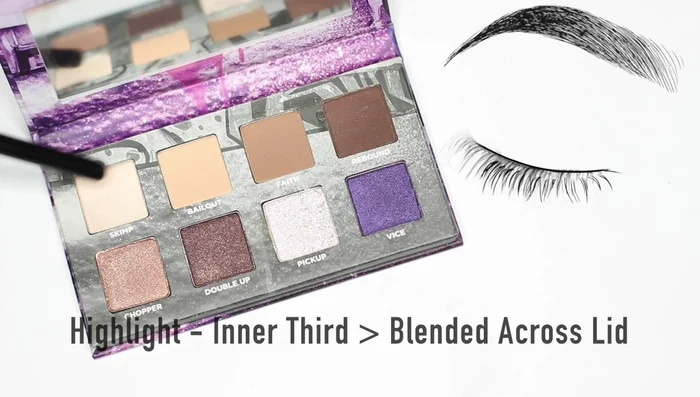
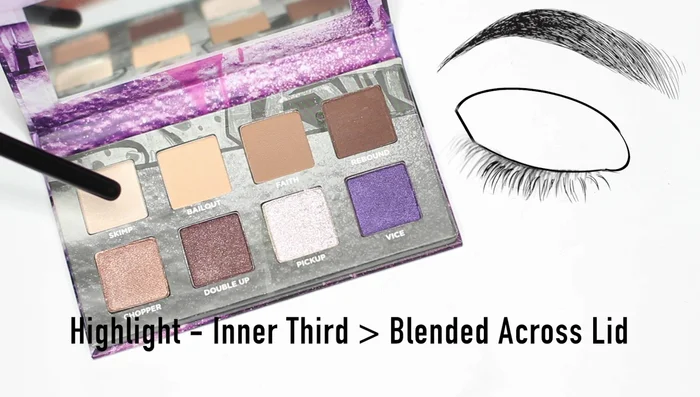
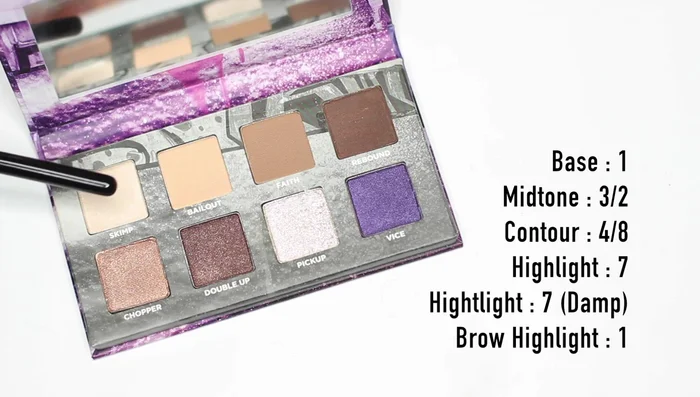
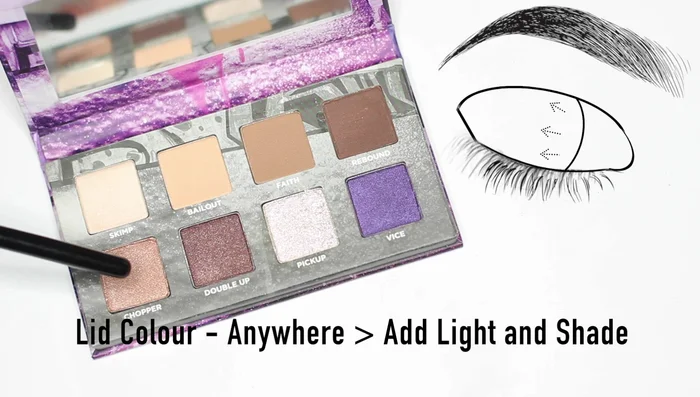
Base Shade Application
- Apply shade number one all over the lid, focusing on the inner corner and sweeping across.

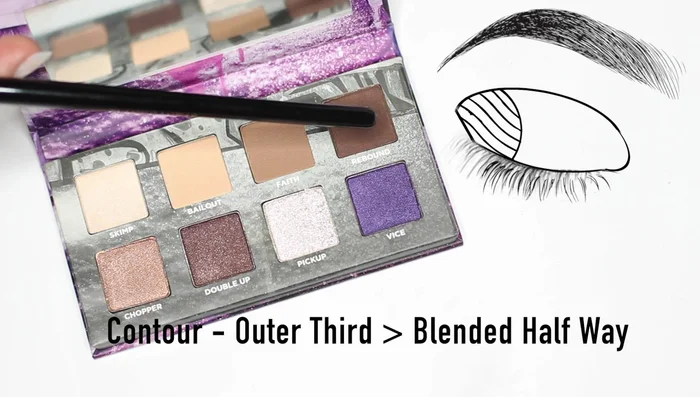
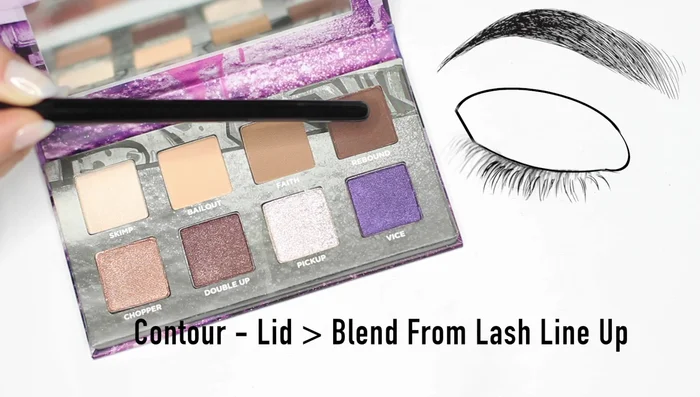
Base Shade Application Contour Shade Application
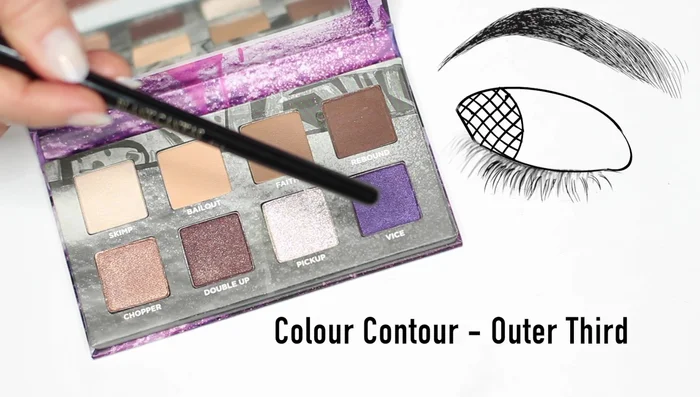
- Apply shade number four on the outer half of the eye as a contour shade, blending softly towards the halfway point.
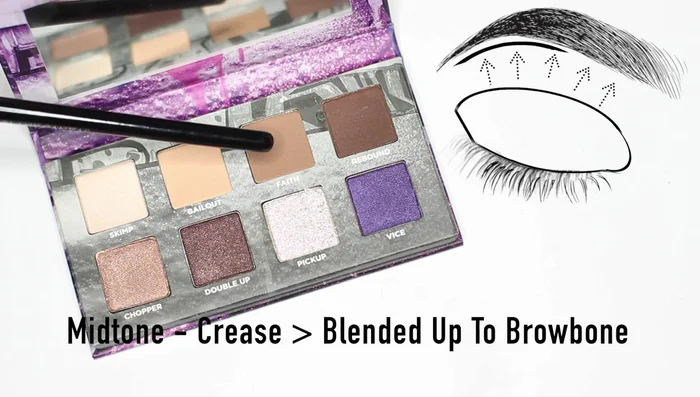
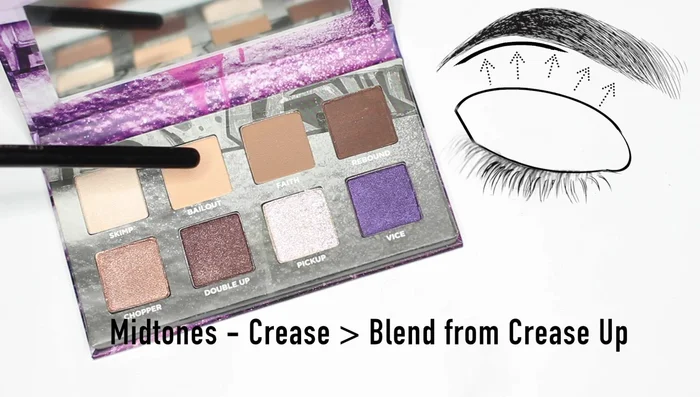
Contour Shade Application Crease Shade Application
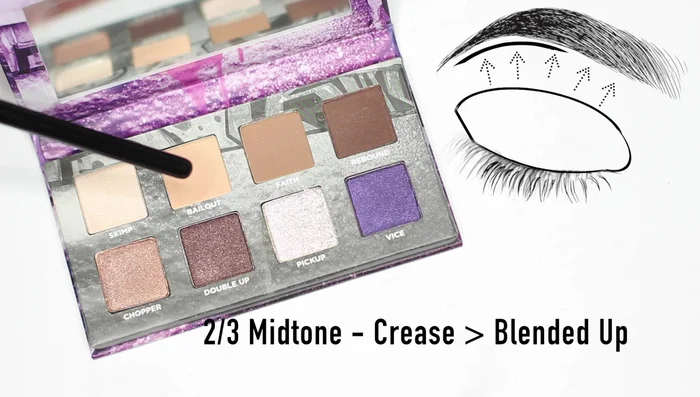
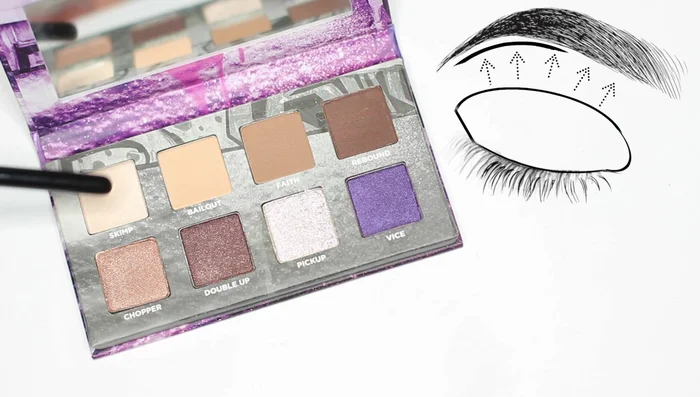
- Apply shade number three in the crease, blending and fading upwards towards the brow bone.
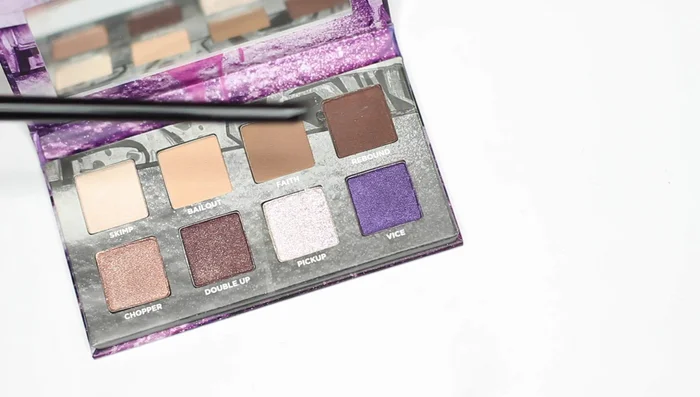
Crease Shade Application Blending and Fading
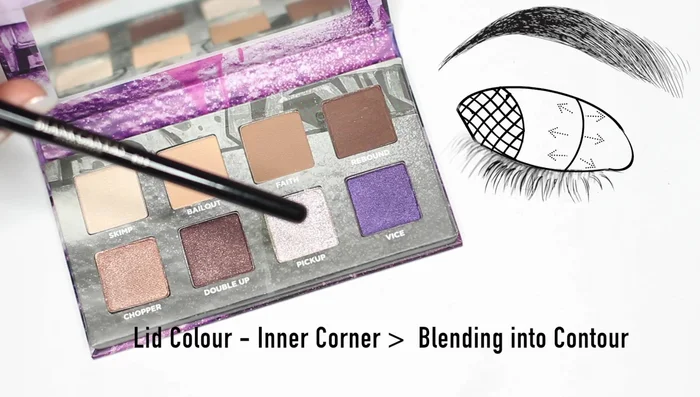
- Use shade number two (fade shade) to blend the light and dark shades together, applying it on the edges of the transition shade and the center of the lid.
Blending and Fading
Methods: Purple Eye Makeup Look
Tools Needed
Step-by-Step Instructions
Base Shade Application
- Apply shade number one all over the lid.
Base Shade Application Crease and Transition Shades
- Apply shades number two and three in the crease.
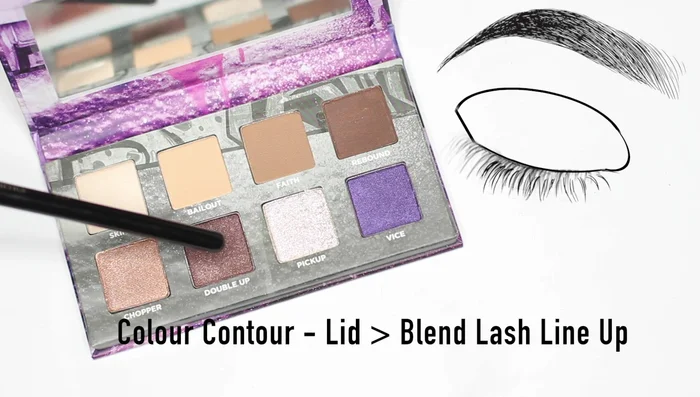
Crease and Transition Shades Outer Corner and Purple Layering
- Apply shade number four on the outer edge of the eye, then layer shade number eight (purple) over it to ground the purple.
Outer Corner and Purple Layering Lid Highlight and Inner Corner Shine
- Apply shade number seven on the rest of the lid, concentrating on the inner corner and sweeping to meet the purple. Add extra shade number seven on a damp brush to the inner corner for shine.
Lid Highlight and Inner Corner Shine Brow Highlight
- Use shade number one under the brows instead of shade number seven to avoid clashing with the purple.
Brow Highlight
Tips
- A true red lipstick complements purple eye makeup.
- Add bronzer to balance the blush and lipstick.
Methods: Smokey Eye Look
Tools Needed
- flat brush
- blending brush
- small brush
Step-by-Step Instructions
Crease Application
- Apply shades number two and three in the crease.
Crease Application Lid Application (Dark Shade)
- Apply shade number four all over the lid from the lash line up to meet shade number three.
Lid Application (Dark Shade) Lid Application (Bronzy Shade)
- Apply shade number six (bronzy tone) all over the lid, working from the lash line up.
Lid Application (Bronzy Shade) Highlight Application
- Apply shade number five to the inner corner or center of the lid for a lighter tone.
Highlight Application Brow Highlight
- Finish with shade number one underneath the brows.
Brow Highlight
Tips
- Add blush to the crease and cheeks, and choose a matching lipstick to unify the look.