The quest for the perfect pout is a timeless one, and while lip fillers offer a significant boost, the art of 3D lip contouring allows for a more subtle, customizable, and entirely makeup-based approach. This technique, utilizing strategic shading and highlighting, can dramatically enhance your natural lip shape, creating the illusion of fuller, more defined lips without needles or long-term commitments. From correcting asymmetry to adding volume where needed, mastering 3D lip contouring unlocks a level of precision that traditional lipstick application simply can't match.
Forget about flat, one-dimensional color; 3D lip contouring employs a multi-faceted approach that plays with light and shadow to sculpt your lips into their most flattering form. Ready to unlock the secret to achieving a naturally enhanced, enviable pout? Let's dive into the step-by-step process that will transform your lip makeup routine.
Safety Guidelines
- Start with a clean, moisturized face. Dry or chapped lips can make contouring look uneven and unnatural.
- Use subtle shading and highlighting. Avoid harsh lines or overly dark colors, which can look artificial and age you. Blend thoroughly for a seamless finish.
- Remove makeup completely at the end of the day. Leaving contour products on overnight can clog pores and irritate the delicate skin around your lips.
Methods: 3D Lip Contouring for Smaller Lips
Tools Needed
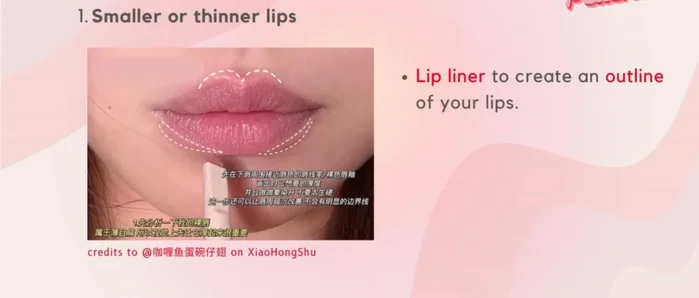
- lip liner
- concealer
- lip brush
Step-by-Step Instructions
Lip Liner Application
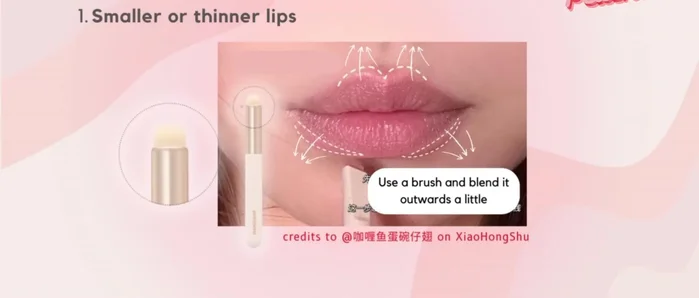
- Use a lip liner to create an outline slightly outside your natural lip line. Choose shades close to your natural lip color.
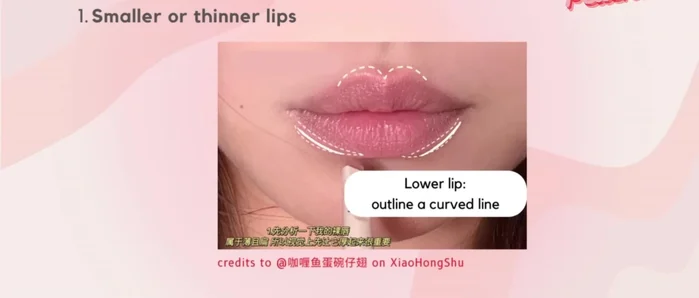
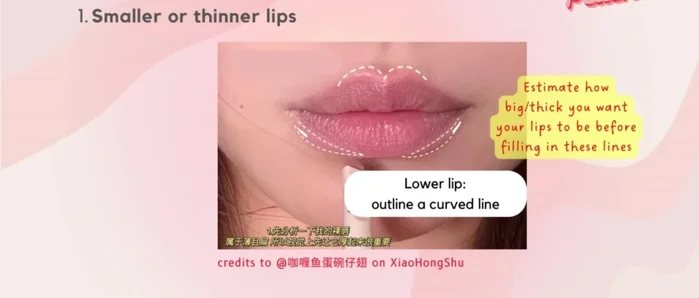
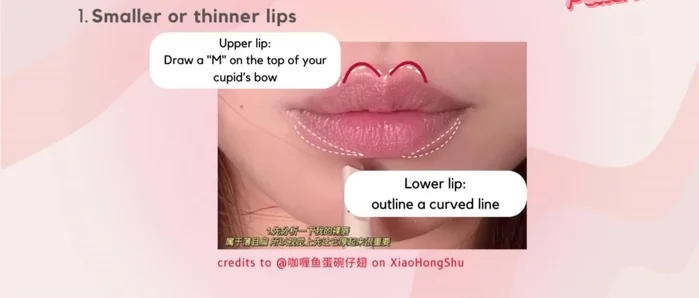
- On the lower lip, outline a curved line at the dotted region (as shown in the video) to create fullness.
- Draw a line in an 'M' shape on your Cupid's bow to increase height.

Lip Liner Application Filling and Shaping
- Fill in the lines, creating a fuller lip shape.
Filling and Shaping Blending and Cleaning
- Use a brush to blend the lip liner outwards slightly.
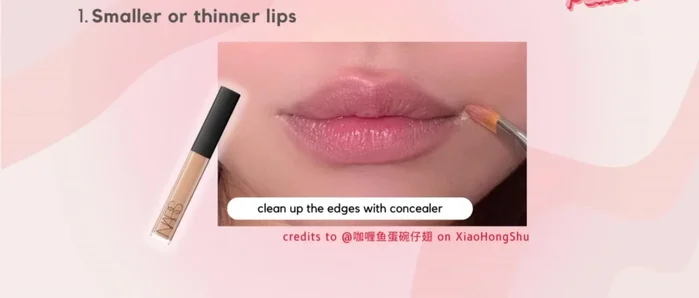
- Use a tiny bit of concealer to clean up any harsh edges.
Blending and Cleaning
Methods: 3D Lip Contouring for Fuller Lips
Tools Needed
- concealer
- foundation
- lip liner
- concealer brush
- fluffy brush
- contour powder
Step-by-Step Instructions
Reduce Lip Volume: Concealing
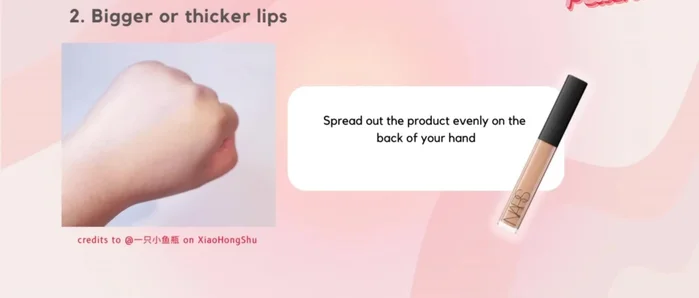
- Conceal the outline of your actual lips using foundation or concealer to reduce volume.
Reduce Lip Volume: Concealing Create a Smaller Outline
- Use a lip liner close to your natural lip shade to create a new, smaller outline.
- Draw an 'M' shape on your Cupid's bow and connect the lines to the mouth corners to create a defined shape.
Create a Smaller Outline Blend and Define
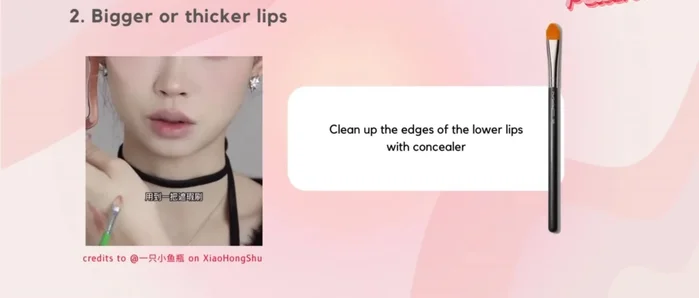
- Blend the lip liner for a natural look.
- Use concealer to clean up the edges.
- Use a fluffy brush and contour powder to deepen the shadows below your lower lip and on the ridge of your philtrum.
Blend and Define


Methods: Matte Lip Look with 3D Contouring
Tools Needed
- matte lip products
- lip brush
Step-by-Step Instructions
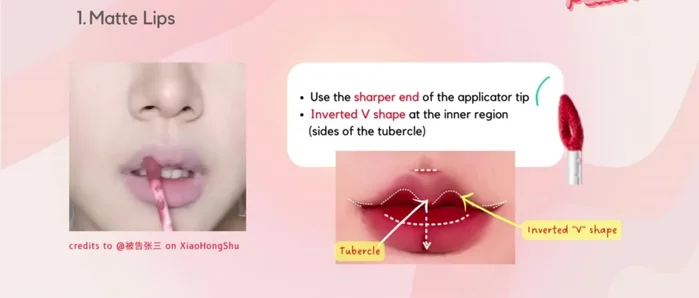
Applying the Base Matte Lip Color
- Apply the lighter matte lip product, tracing an inverted 'V' shape at the inner region of the upper lip and short horizontal lines at the mouth corners.
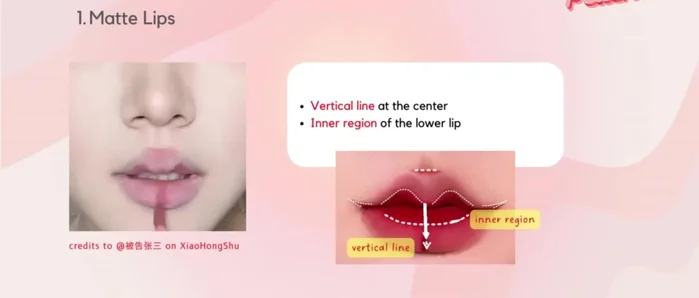
- Apply the lighter shade to the inner region of the lower lip and add a vertical line in the center.
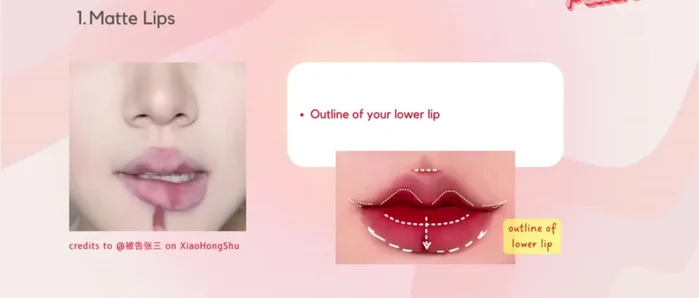
- Fill in according to the outlined shape.
Applying the Base Matte Lip Color Adding Depth with Darker Matte Lip Color
- Apply the darker matte lip product to the inner region of the lower lip and sides of the upper lip to create contour.
Adding Depth with Darker Matte Lip Color Blending and Finishing
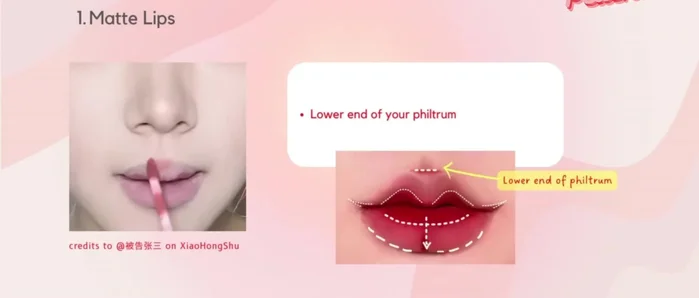
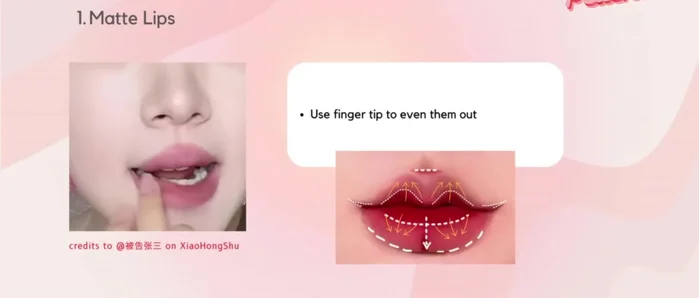
- Add a tiny bit of product to the lower end of your philtrum and blend.
- Blend the darker shade into the lighter shade for a natural look.
Blending and Finishing

Methods: Lip Gloss Application for a 3D Effect
Tools Needed
- lip gloss
Step-by-Step Instructions
Base Gloss Application
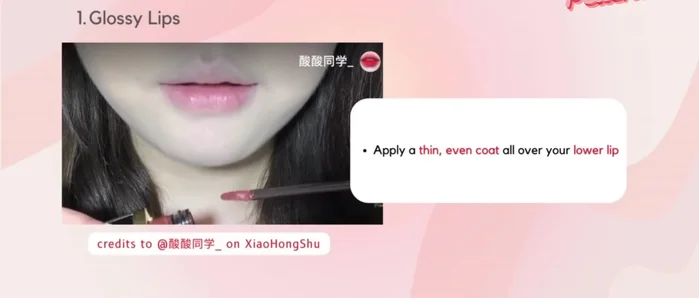
- Apply a thin, even coat of lip gloss all over your lower lip. Press your lips together to distribute evenly.
Base Gloss Application Even Distribution
- Dab out the lip gloss to spread to any patchy areas.
Even Distribution 3D Highlight Application
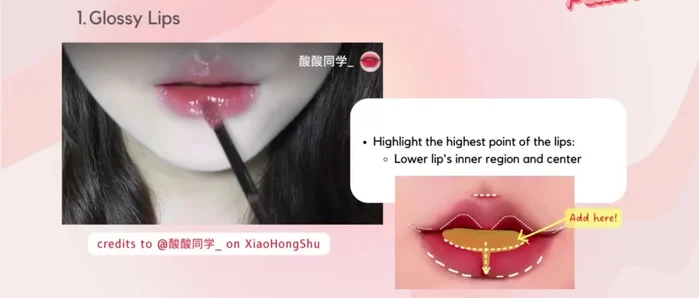
- Apply another coat to the highest point of your lips, the inner region of your lower lip, and a vertical line in the center of the lower lip. Do an inverted 'V' shape on the upper lip and add a touch to the philtrum.
3D Highlight Application Blending and Finishing
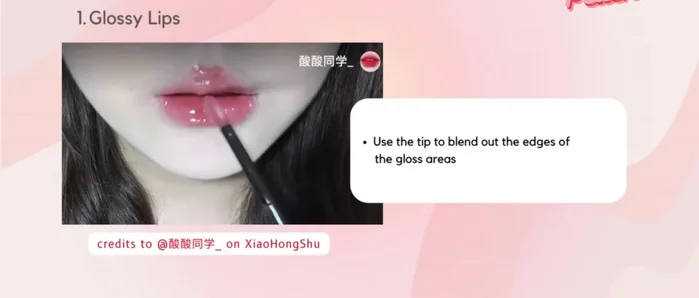
- Use the lip gloss applicator to blend the edges.
Blending and Finishing

Methods: Combined Matte and Gloss Technique
Tools Needed
- matte lip products
- lip gloss
- lip brush
Step-by-Step Instructions
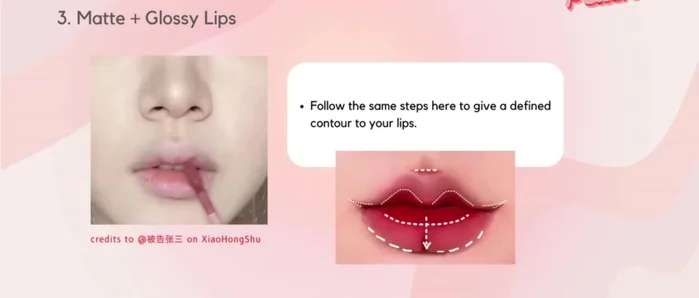
Matte Base Application
- Repeat the matte lip application steps from the first matte technique to create a defined contour.
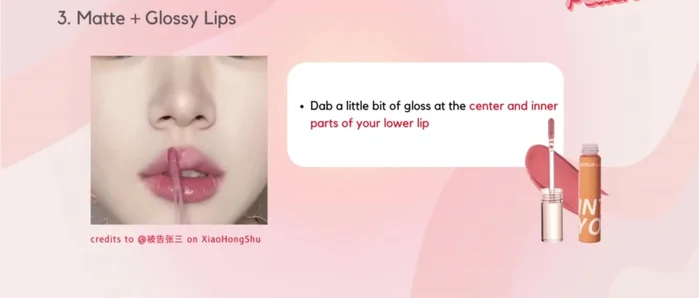
Matte Base Application Gloss Application
- Dab lip gloss onto the center and inner parts of the lower lip and the center of the upper lip.
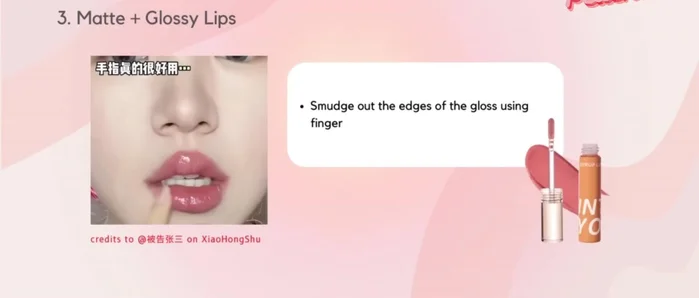
Gloss Application Blending
- Blend the gloss into the matte lip product for a natural look.
Blending
Read more: Perfect Lipstick Application: Two Easy Techniques for Flawless Lips